By Emma, professional cosmetic colorist and manicure consultant based in Los Angeles, with 7+ years of experience in undertone matching, seasonal color forecasting, and polish finishes.
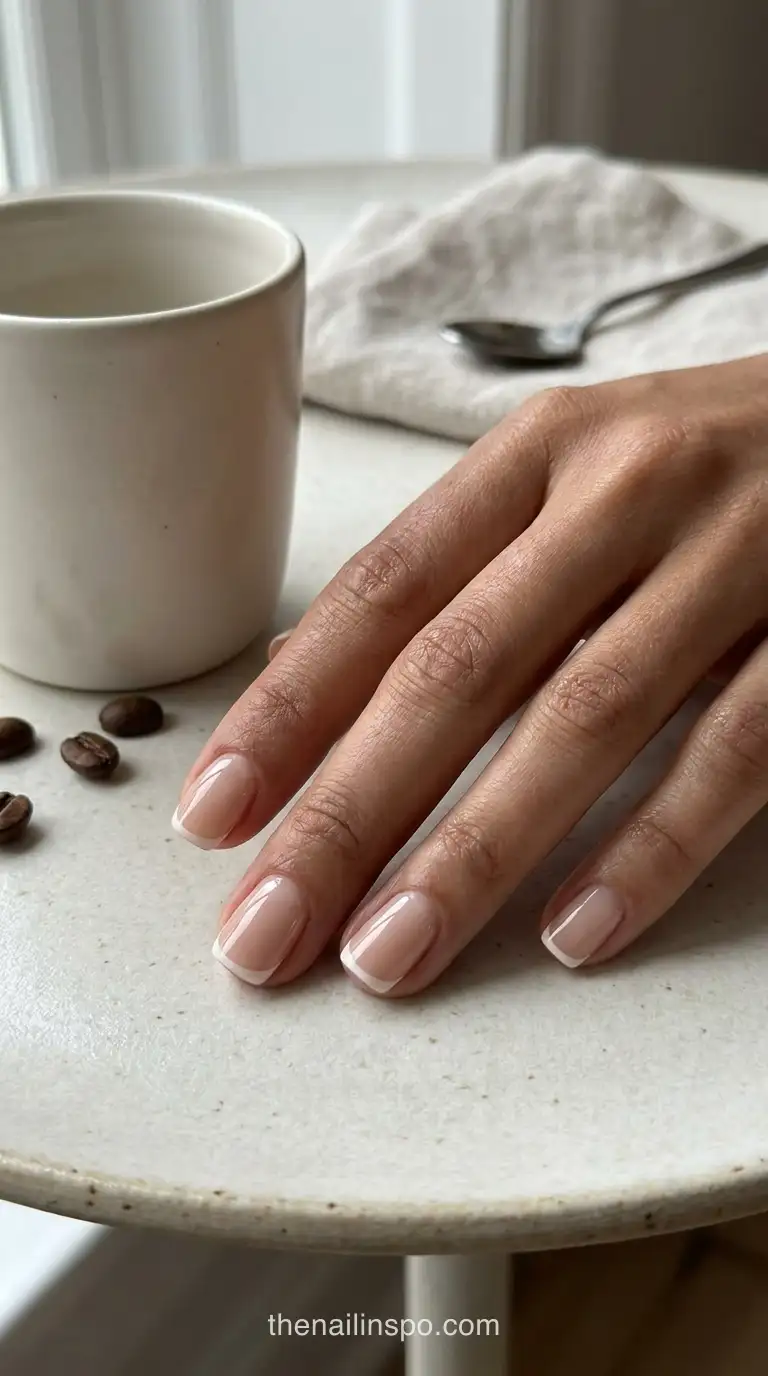
For a first set, I’d choose micro french tip nails with a translucent neutral base, a white edge, and a short square or oval shape. The contrast makes the design readable without relying on extra length. If white feels too bright against your chosen base, a softer ivory or blush border is an alternative, not a compulsory skin-tone rule. The 17 references below range from quiet matte edges to reflective chrome and small painted accents. Choose the outline first, then the finish. A reference that shows both matters more than a trend label on the booking form.
Key takeaways- A micro-French traces the nail’s edge with a delicate line; no verified industry-wide millimeter standard defines it.
- Minimal-looking art isn’t automatically easy: narrow borders leave little room to disguise an irregular outline.
- Colored tips can retain a neutral base rather than requiring full-color coverage.
- Include a close-up and a full-hand booking reference to show detail and proportion.
How to Choose Your Micro-French Base and Tip
Choose the base and border together, then check the pairing on the nail length you actually intend to wear. A tip that disappears against its base needs more contrast, not necessarily more width. Undertone matching is a preference-led starting point; it isn’t a rule that excludes colors from particular people.
For a quieter result, reduce contrast between the base and edge. For a more graphic result, increase it. Opacity is a separate decision: a translucent base shows more of the underlying nail than an opaque one, even when both are described as nude. Use choosing polish colors for your undertone to narrow the base family, then compare the actual sample with your hand.
Don’t borrow a long-nail reference and assume its proportions will translate unchanged. A narrow edge on a short nail has less space for extra motifs. Choose the plain border first if the available nail plate cannot comfortably separate the tip from a dot, flower, or second line.
| If your… | Go with | Finish | Verdict |
|---|---|---|---|
| You prefer cooler pinks and want a short everyday set. | Pair a rosy translucent base with a porcelain edge. | Use a sheer-looking base with a smooth topcoat. | Choose this when you want a pale border that remains easy to see. |
| You prefer warmer neutrals for an office manicure. | Try a peach-beige base with a dusty-rose tip. | Keep the surface matte if you want less reflected light. | Choose this for lower contrast rather than a bright white outline. |
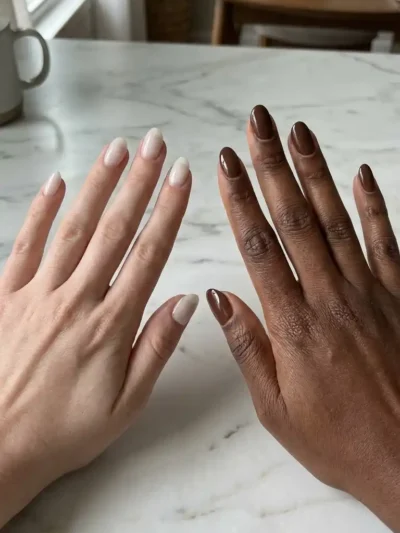
| You want a darker edge on medium almond nails. | Put espresso brown over a neutral translucent base. | Keep the tip glossy and visually separate from the base. | Choose this when the tapered silhouette matters more than added art. |
| You want a reflective wedding reference on short nails. | Pair a rosy base with pearl or silver edging. | Use a localized chrome finish rather than all-over reflection. | Choose this if you can show the technician how the edge should catch light. |
 Read NextBest Sheer Nail Polish: 22 Top Shades to Buy Now!
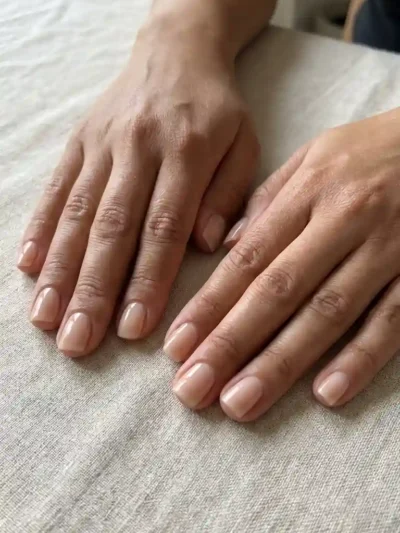
1. Porcelain White Sheer Micro Tips on Short Squares
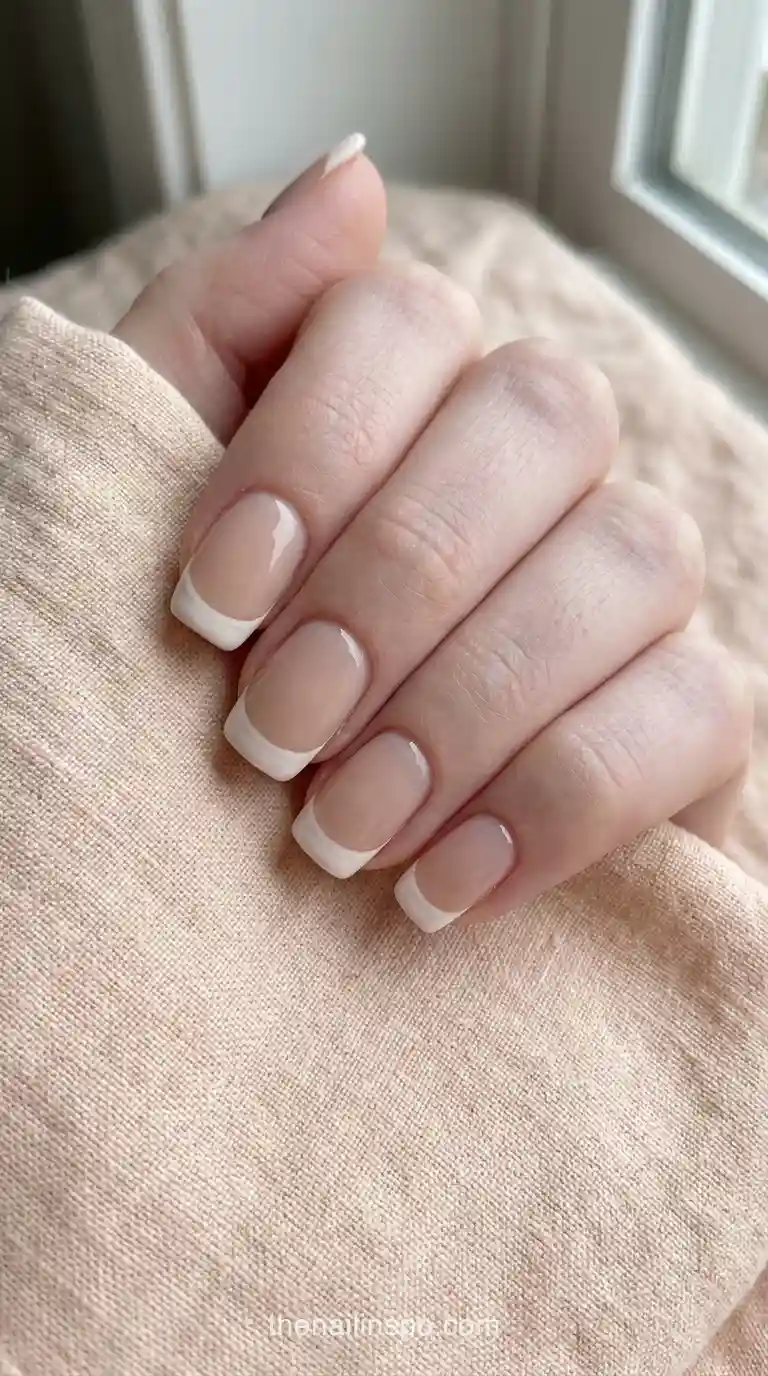
Porcelain edges over a translucent beige-pink base keep short square nails readable. The important detail is the corner: carry the line around it rather than leaving a blunt white stop. Choose this version when you want a visible tip without adding extra natural nail length.
- Best For: Short natural nails when you want a clearly visible pale edge.
- Skin Tone: Cool or neutral undertones with a rosy-beige base preference.
- Expert Tip: Compare the white against the base before committing to the full set.
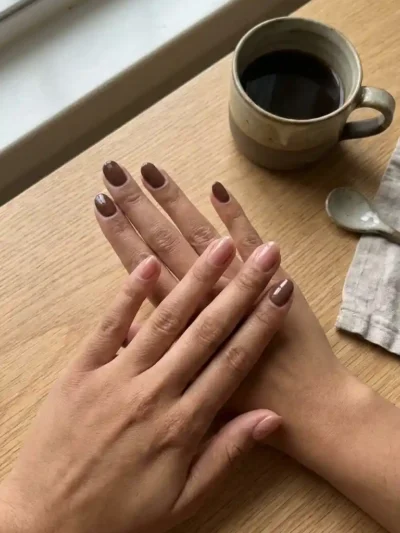
2. Espresso Gloss Micro Tips on Medium Almonds
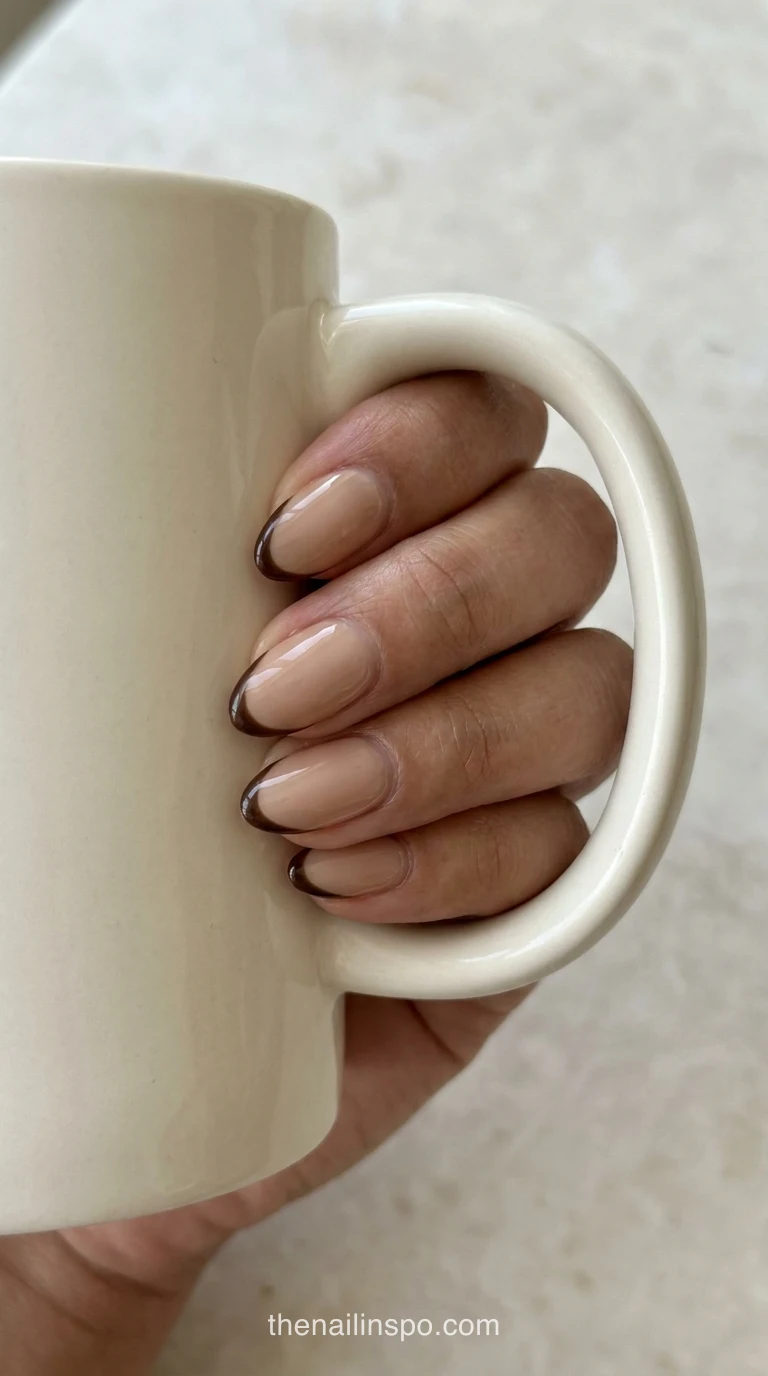
Compare this espresso edge with the white square set: the deeper color makes the curve more obvious, even though the line stays narrow. Medium almond nails give it a tapered outline and a glossy surface. Keep the brown concentrated at the perimeter; a thick center section changes the design into a conventional French tip.
- Best For: Medium almond nails without an extra painted motif.
- Skin Tone: Warm or neutral undertones that favor brown over black.
- Expert Tip: Check the almond point from above so the edge stays centered.
 Read NextBest Nail Shape for Natural Nails: 5 Effortless Picks
3. Pearl Chrome Micro Tips on Short Oval Nails
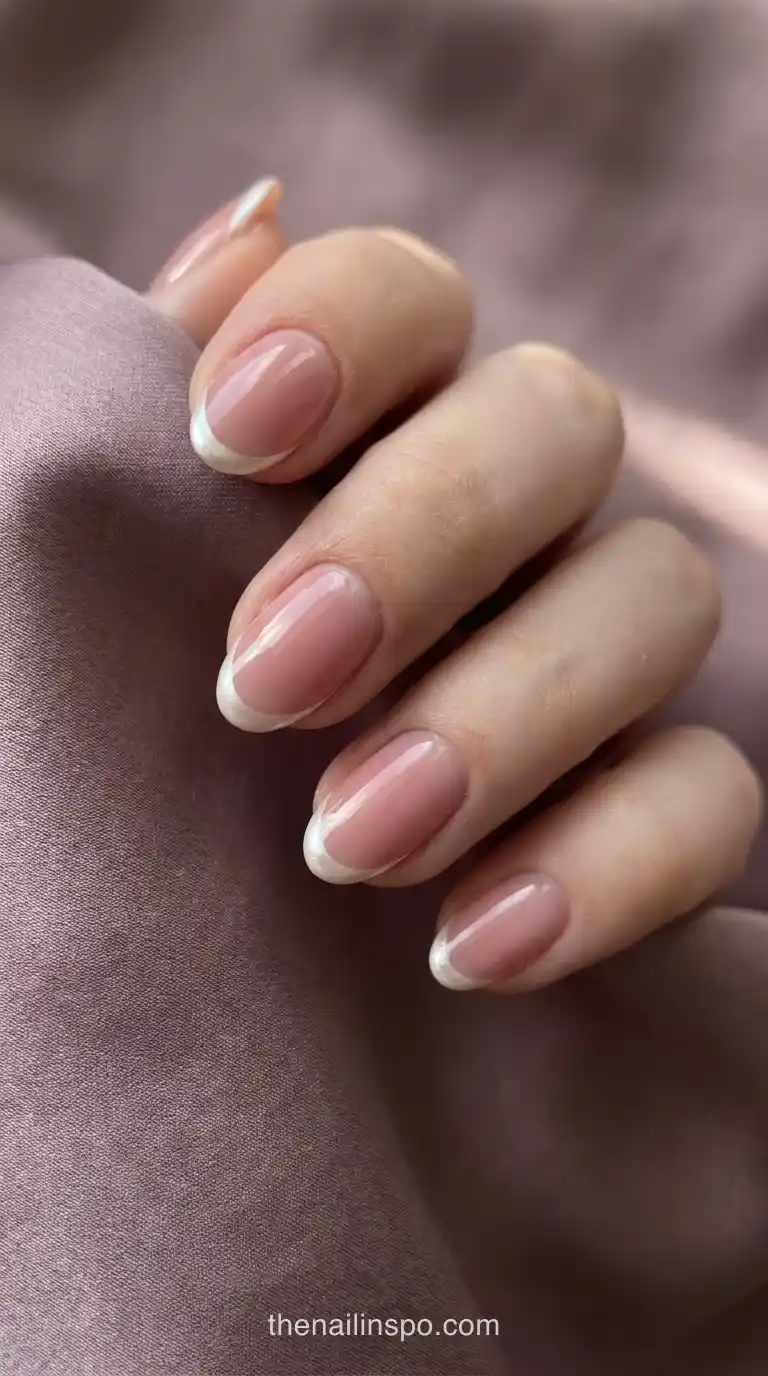
Reflective, but barely there. Pearl chrome sits along the edge of short oval nails above a translucent rosy base. Ask to see the sample under both directional and diffuse light, because the reflection can hide the line in a screenshot. Skip an all-over chrome coating if your priority is keeping the tip visually separate from the base. That makes this a lighting-sensitive choice, even though its small surface area suggests a straightforward design at first.
- Best For: A short bridal reference with localized reflection.
- Skin Tone: Cool undertones that prefer a pink base beneath pearl.
- Expert Tip: Keep a nonreflective reference view alongside the brighter close-up.
4. Dusty Rose Matte Micro Tips on Short Rounds
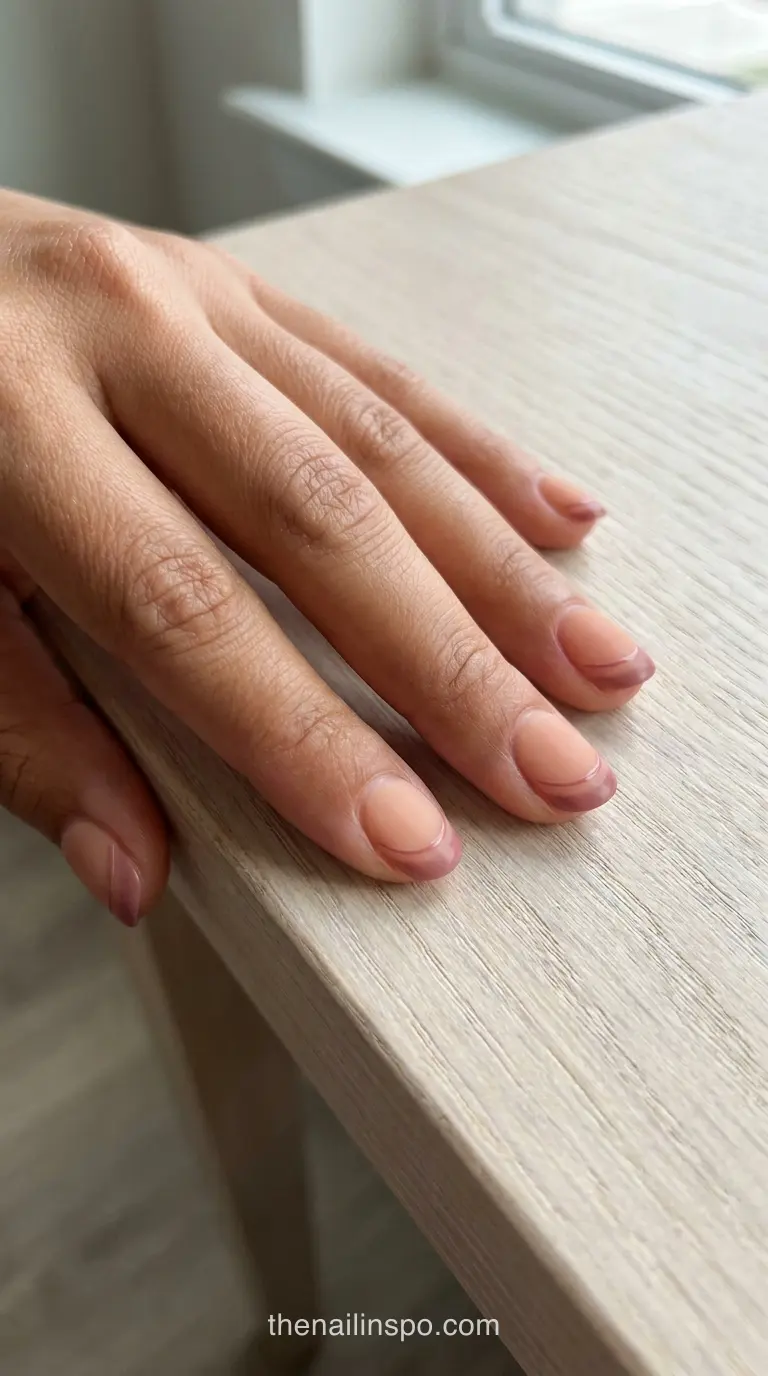
Match the matte topcoat to the design before painting the dusty-rose edge on these short round nails. Without a specular highlight, the silhouette has to do more of the work. The muted tip and soft peach base make a low-contrast pairing; choose it for a subdued reference, not for a sharply outlined French look.
- Best For: Office wear when bright white feels too contrasting.
- Skin Tone: Warm undertones paired with a peach-leaning base.
- Expert Tip: Ask whether the matte finish changes the apparent shade of your sample.
5. Electric Pink Jelly Tips With One Accent Dot
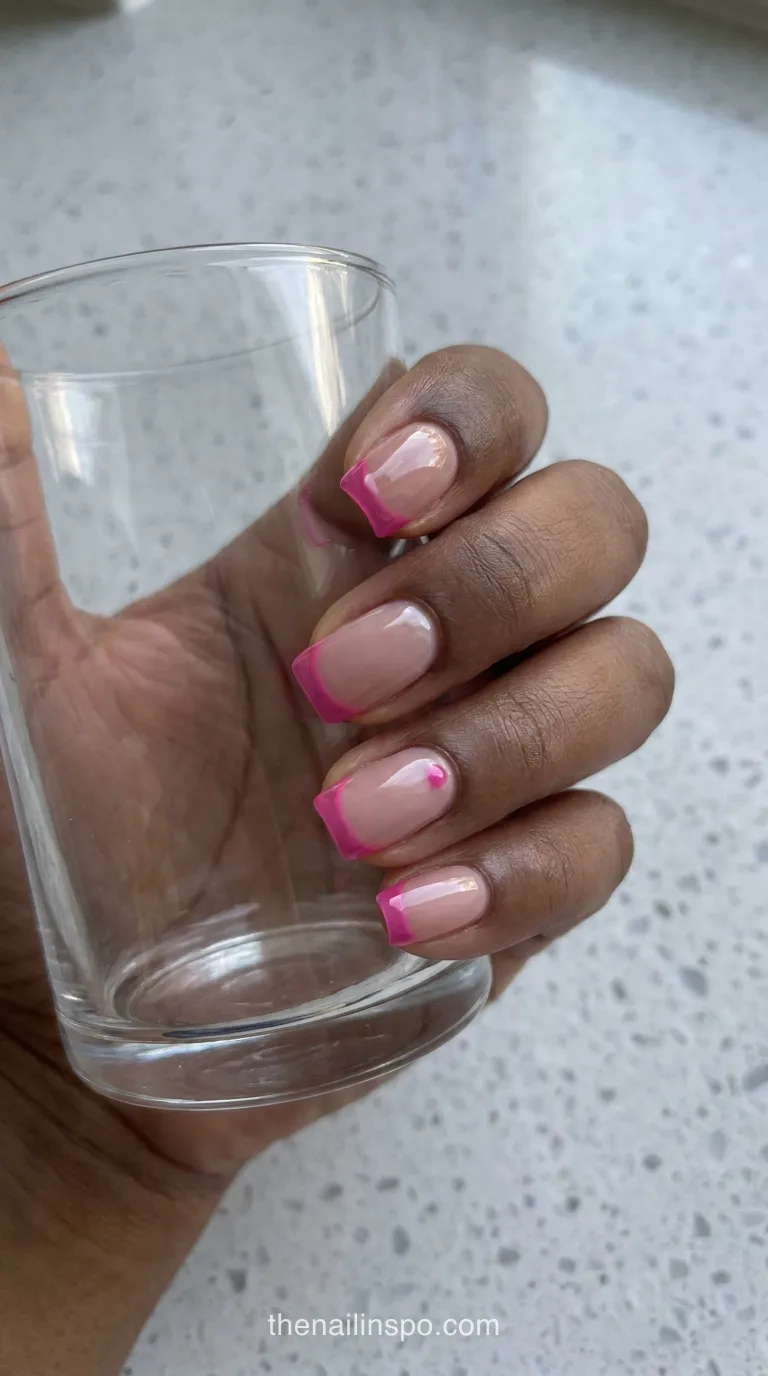
For a small color hit, put translucent electric pink along medium square edges and add one matching dot on the ring finger. Jelly color lets the underlying edge influence the result, so a swatch over the intended base matters more than the bottle color. Keep the dot away from the tip to preserve two separate focal points.
- Best For: A colorful weekend set with only one small extra motif.
- Skin Tone: Neutral or cool undertones that favor blue-leaning pink.
- Expert Tip: View the translucent tip over a bare-edge swatch as well as the base.
6. Champagne Glitter Micro Tips on Long Coffins
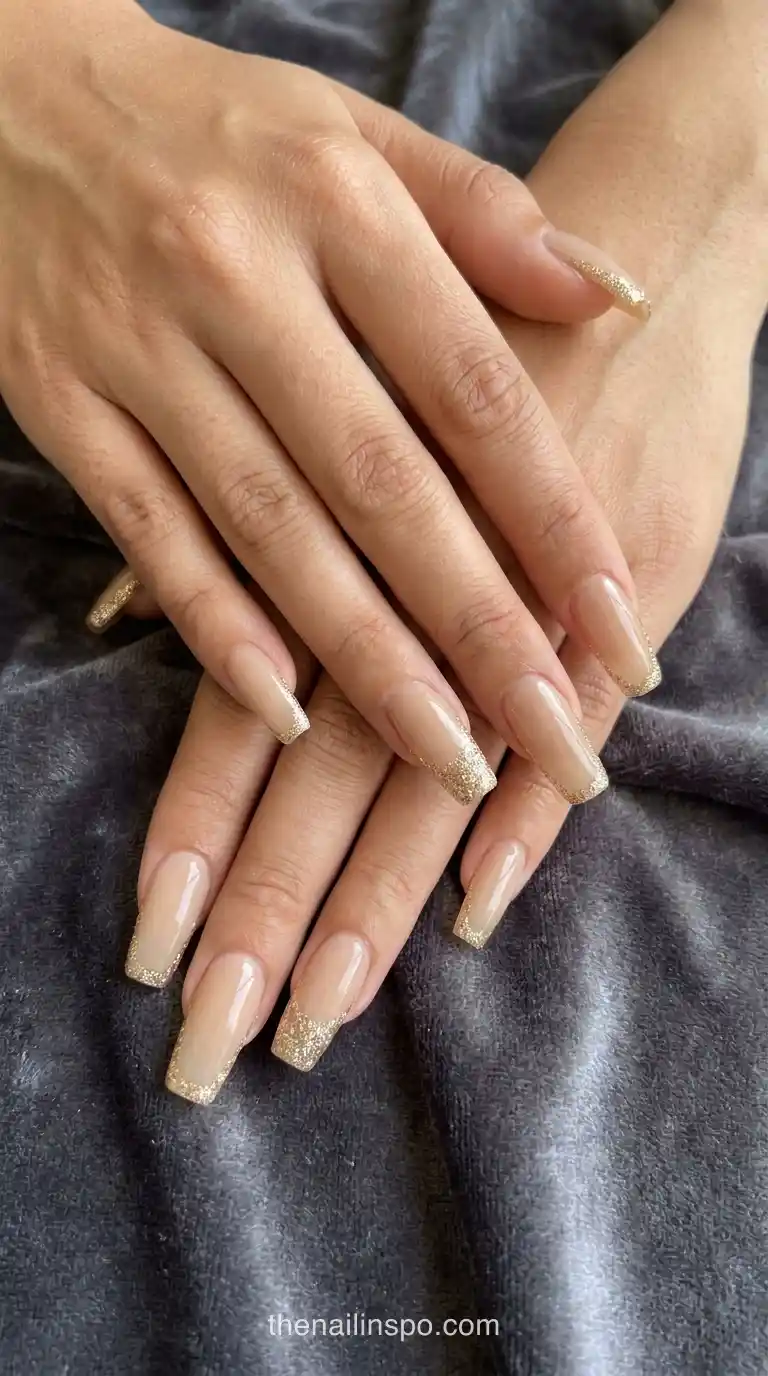
Champagne sparkle belongs on the perimeter here, not across the entire nail. Long coffin nails carry a fine glitter edge, with slightly denser sparkle on the ring finger. Large particles can make a narrow border look ragged; select a finer texture when a continuous line matters. My vote: full-coverage glitter is overrated for this particular brief.
- Best For: Long coffin nails for an evening event.
- Skin Tone: Warm undertones with a preference for golden sparkle.
- Expert Tip: Photograph the accent beside an unaccented nail to compare the glitter density.
7. Ivory Double Micro Lines on Short Round Nails
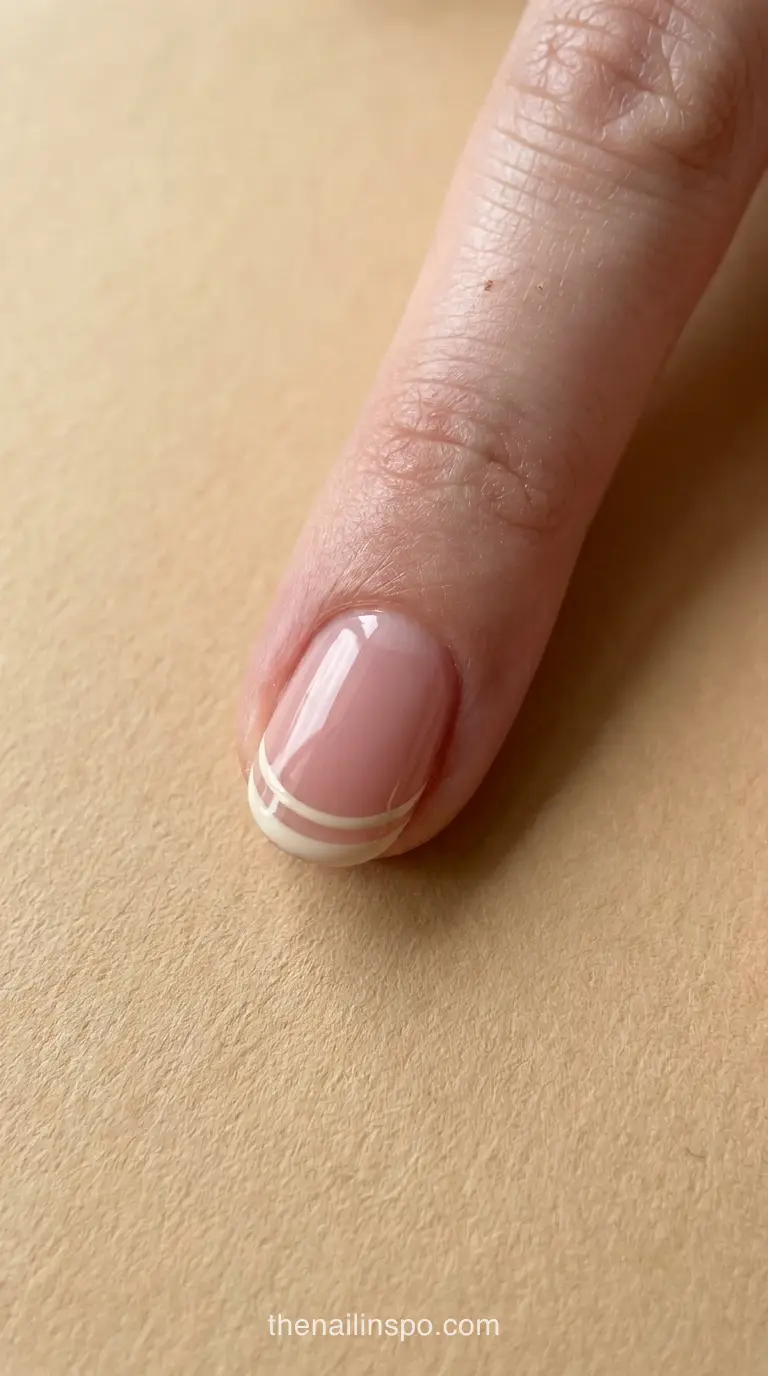
Two ivory curves frame the ends of short round nails, separated by a visible strip of the sheer pink base. Establish the outer line first so the second follows the same arc. If the gap disappears at the sides, simplify to one border rather than thickening both. The negative space is what distinguishes this design.
- Best For: Short round nails when one border feels too plain.
- Skin Tone: Neutral undertones that prefer ivory to stark white.
- Expert Tip: Leave the base unobstructed below the inner curve to preserve the layered look.
8. Lavender Sheer Micro Tips With One Accent Nail
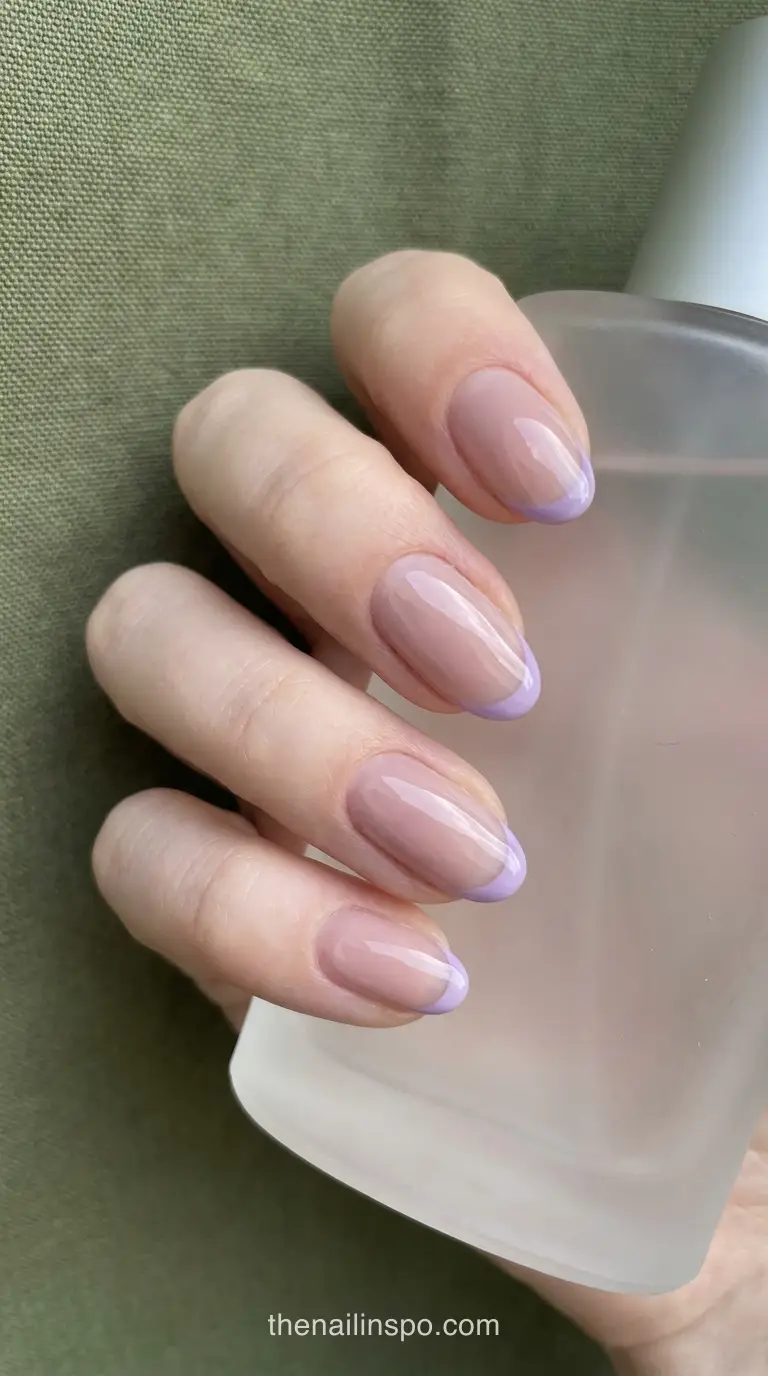
Lavender stays translucent on medium oval nails, while a single ring-finger tip becomes opaque. That contrast creates an accent without a different motif. Check that the sheer tips remain visible against the base in ordinary daylight. If they disappear completely, adjust contrast instead of widening the edge; the lightness of the line is the point.
- Best For: Medium oval nails with a single color-density accent.
- Skin Tone: Cool undertones paired with a neutral-pink base.
- Expert Tip: Specify the accent finger before the technician begins the color placement.
9. Burgundy Velvet Double Tips on Long Stilettos
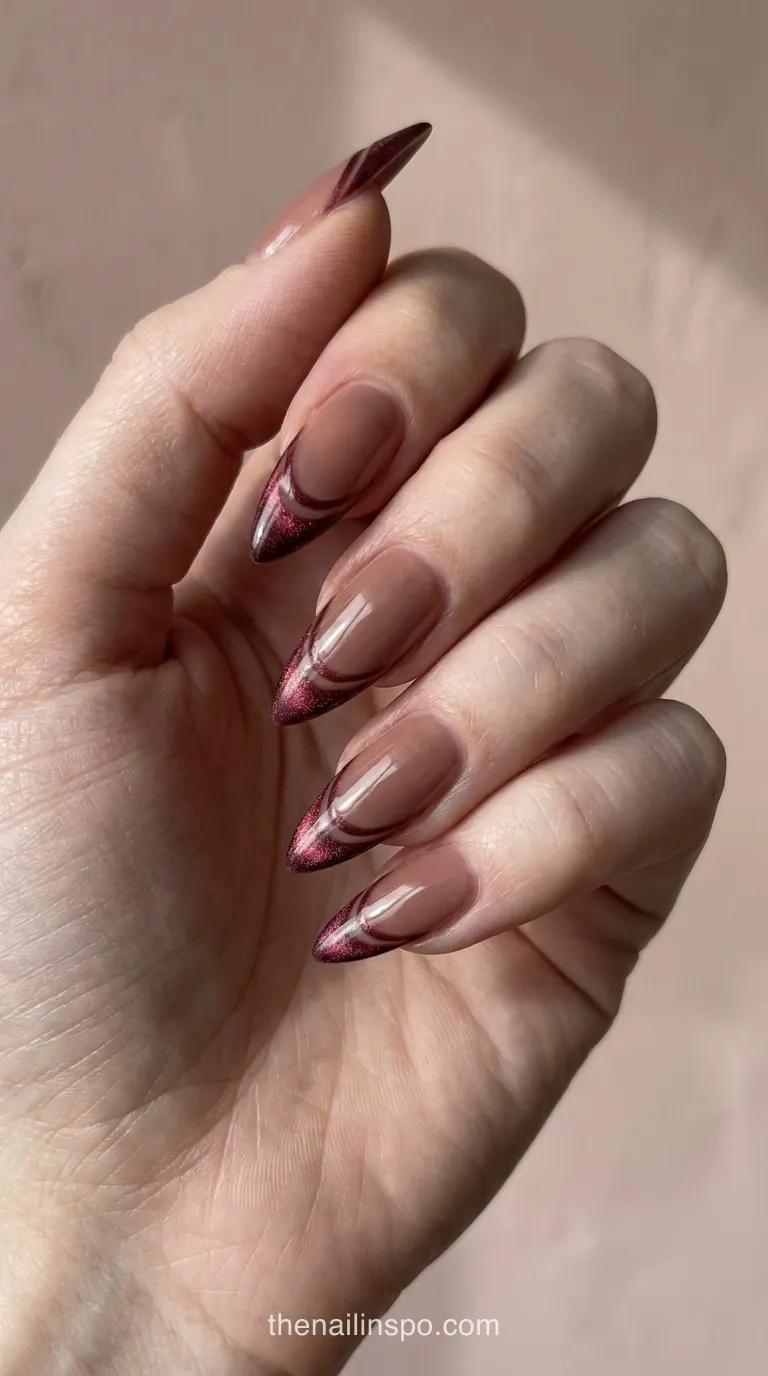
Under directional light, a burgundy velvet edge reads as a narrow moving highlight on long stiletto nails. A second fine curve sits just behind it. Magnetic placement needs to be checked before the product is cured, following its own instructions. Choose this for a textured close-up rather than expecting an identical appearance from every viewing angle. Both lines should remain visible when the fingers turn away from the light.
- Best For: Long pointed nails for a textured party reference.
- Skin Tone: Deep skin with cool or neutral undertones.
- Expert Tip: Request a side-angle check so the two borders remain separate near the point.
10. Cherry Red Gloss Tips With Hand-Painted Hearts
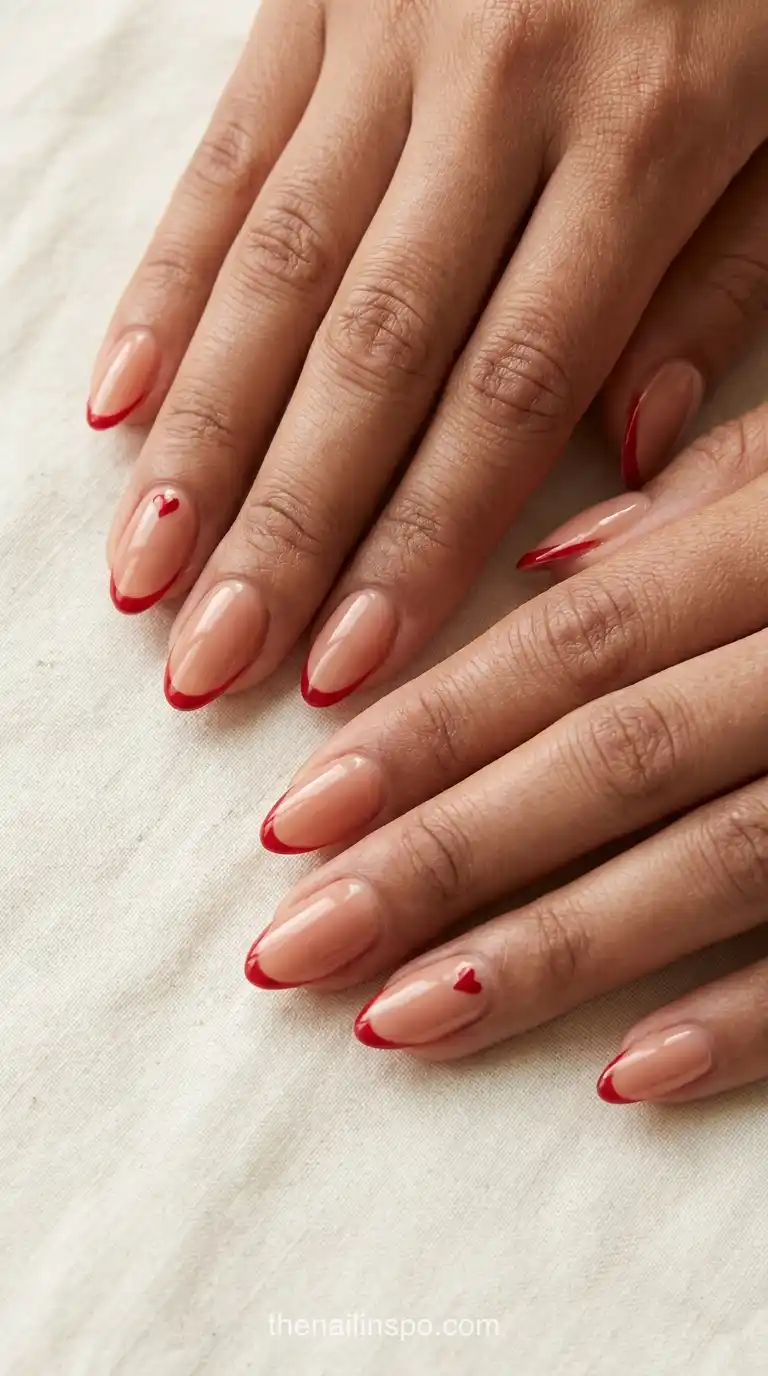
Cherry red follows the tapered edge of medium almond nails, with one tiny hand-painted heart on each ring finger. Leave the other bases translucent and glossy. Position the hearts well below the smile line so they do not merge with the tips. This is the brighter alternative to the espresso set, with a clearly different accent.
- Best For: A small romantic motif without a full patterned set.
- Skin Tone: Warm or neutral undertones with a peach-neutral base.
- Expert Tip: Keep the heart scale consistent between the two ring fingers.
11. Sage Matte Micro Tips With Soft Ombré Bases
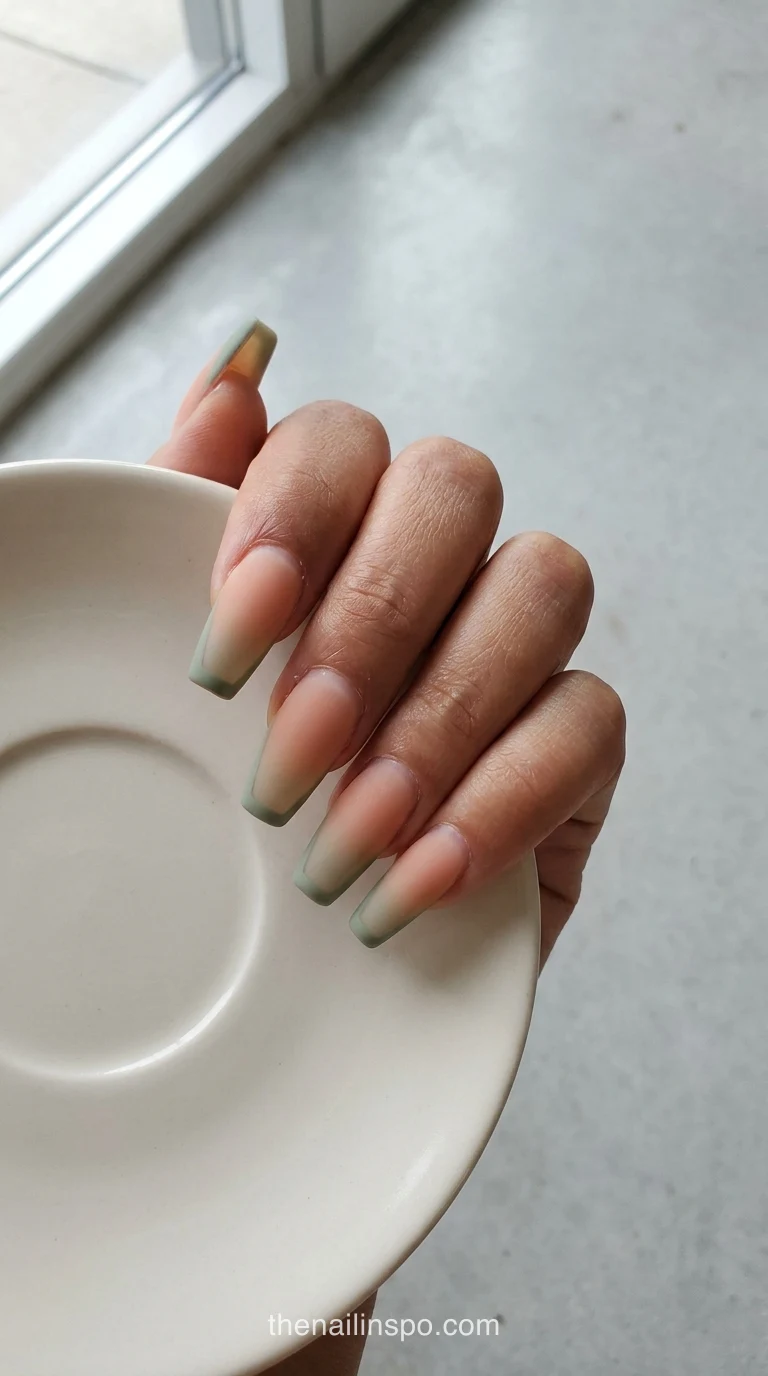
Build the soft base gradient before adding matte sage borders to long coffin nails. A pale peach center fades toward a clearer perimeter, leaving the green edge legible. Make the gradient transition broad and the tip narrow; two equally sharp boundaries compete. Choose this if you want a seasonal color without painting the whole nail green.
- Best For: A green seasonal set that leaves most of the base visible.
- Skin Tone: Warm undertones that favor softened green over icy mint.
- Expert Tip: Compare the sage sample beside your usual jewelry before choosing the base.
12. Silver Chrome Micro Tips With Fine Star Details
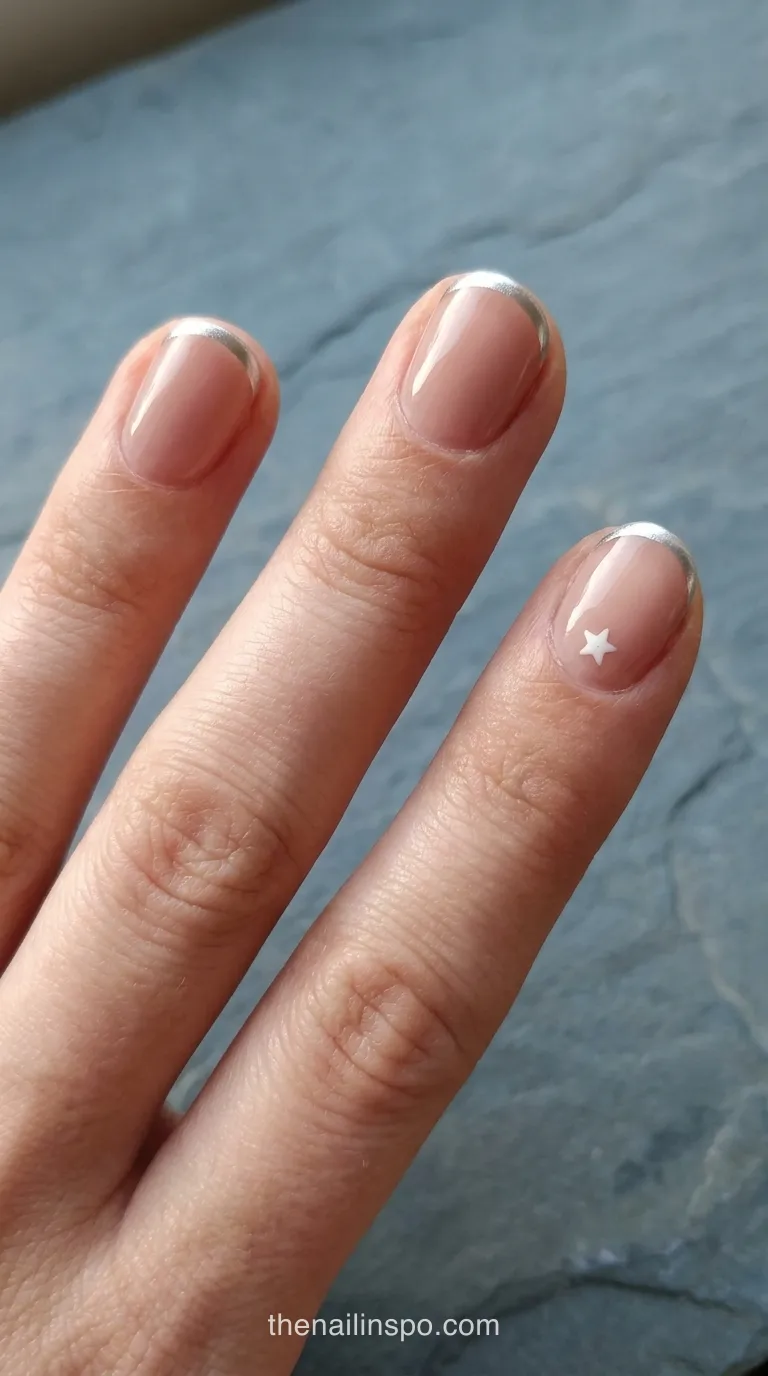
Silver traces short round edges while tiny hand-painted stars sit on the ring fingers. Keep the stars closer to the lower half of the nail. Photograph the set with a light source off to one side; flat lighting can turn a reflective silver border into ordinary gray.
- Best For: Short nails with one small celestial accent.
- Skin Tone: Cool or neutral undertones that prefer silver reflection.
- Expert Tip: Keep the star points distinct rather than building a dense white patch.
13. Amber Jelly Micro Tips With Gradient Bases
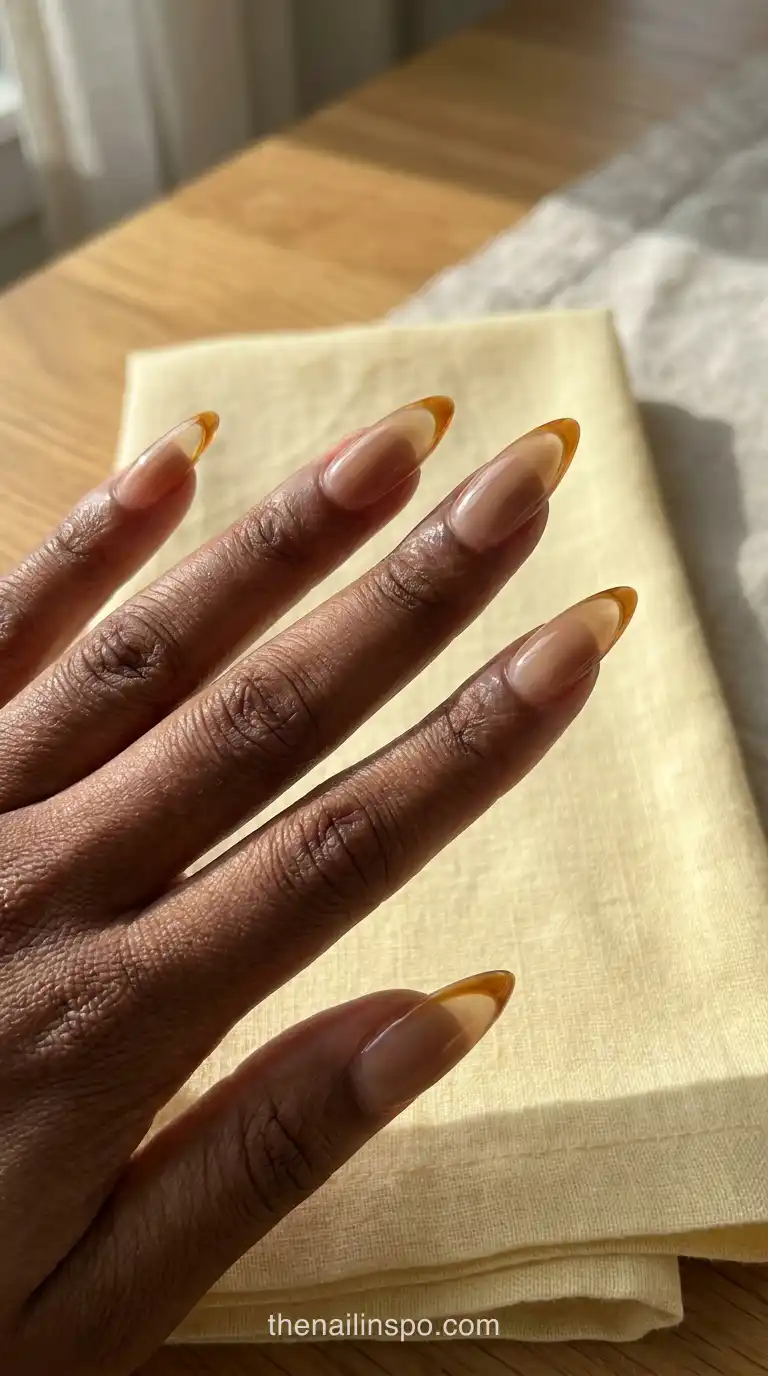
Amber jelly edges warm up long stiletto nails over a translucent gradient base. The apparent color changes where the base becomes less opaque, which is part of this look rather than a defect. Ask for a sample with the same gradient placement. Skip it if you want every section of the tip to show identical color density.
- Best For: Long pointed nails when uneven color density is intentional.
- Skin Tone: Warm undertones, including medium and deep skin.
- Expert Tip: Show the technician where you want the transparent section of the gradient.
14. Lime Glitter Double Tips on Medium Squares
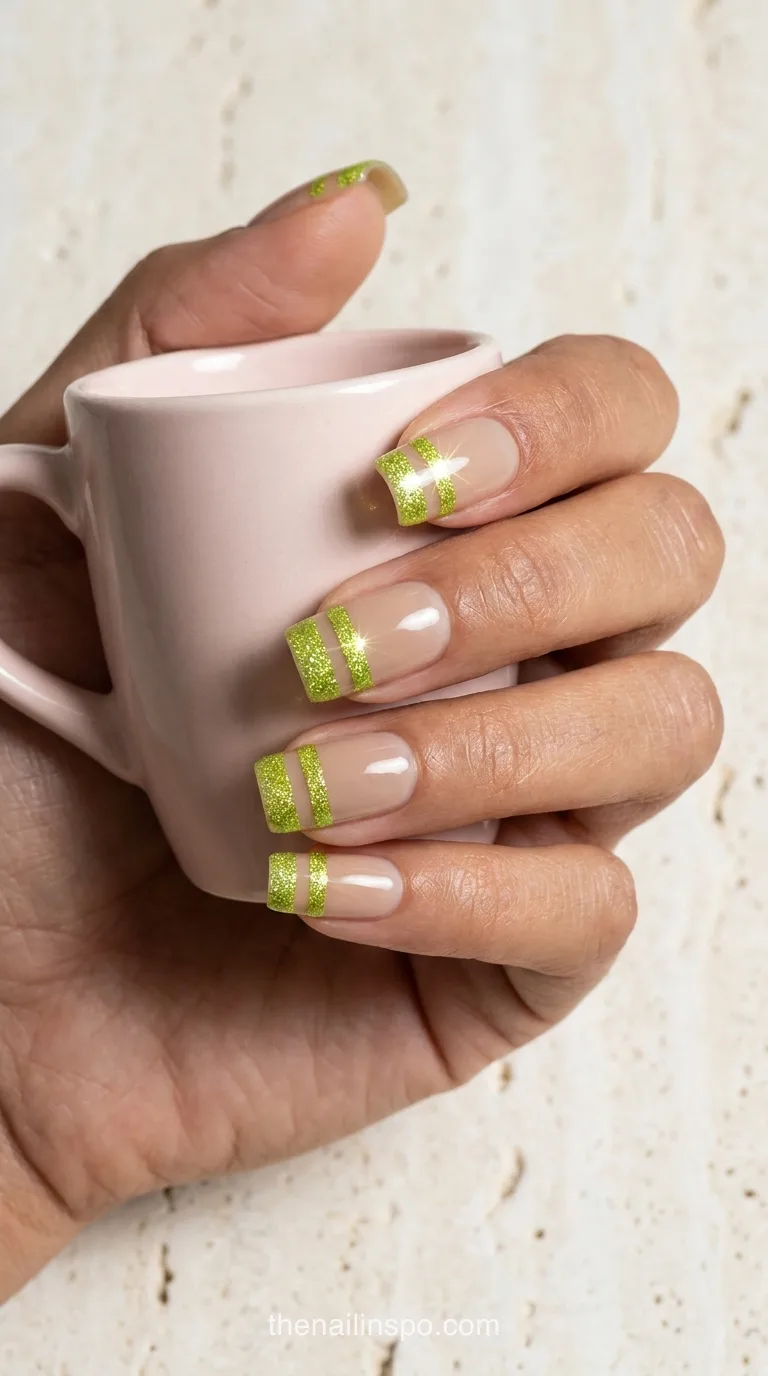
Lime glitter makes two narrow borders across medium square tips, with a clear gap between them. Unlike the champagne set, the contrast comes from neon color as well as reflection. Test the particle size against the available space before committing. If individual flecks bridge the gap, use finer glitter instead of enlarging the bands.
- Best For: Medium square nails for a bright summer reference.
- Skin Tone: Neutral undertones or warm skin that suits yellow-green accents.
- Expert Tip: Use a neutral base if you want the lime to remain the main color.
15. Midnight Velvet Micro Tips With One Accent
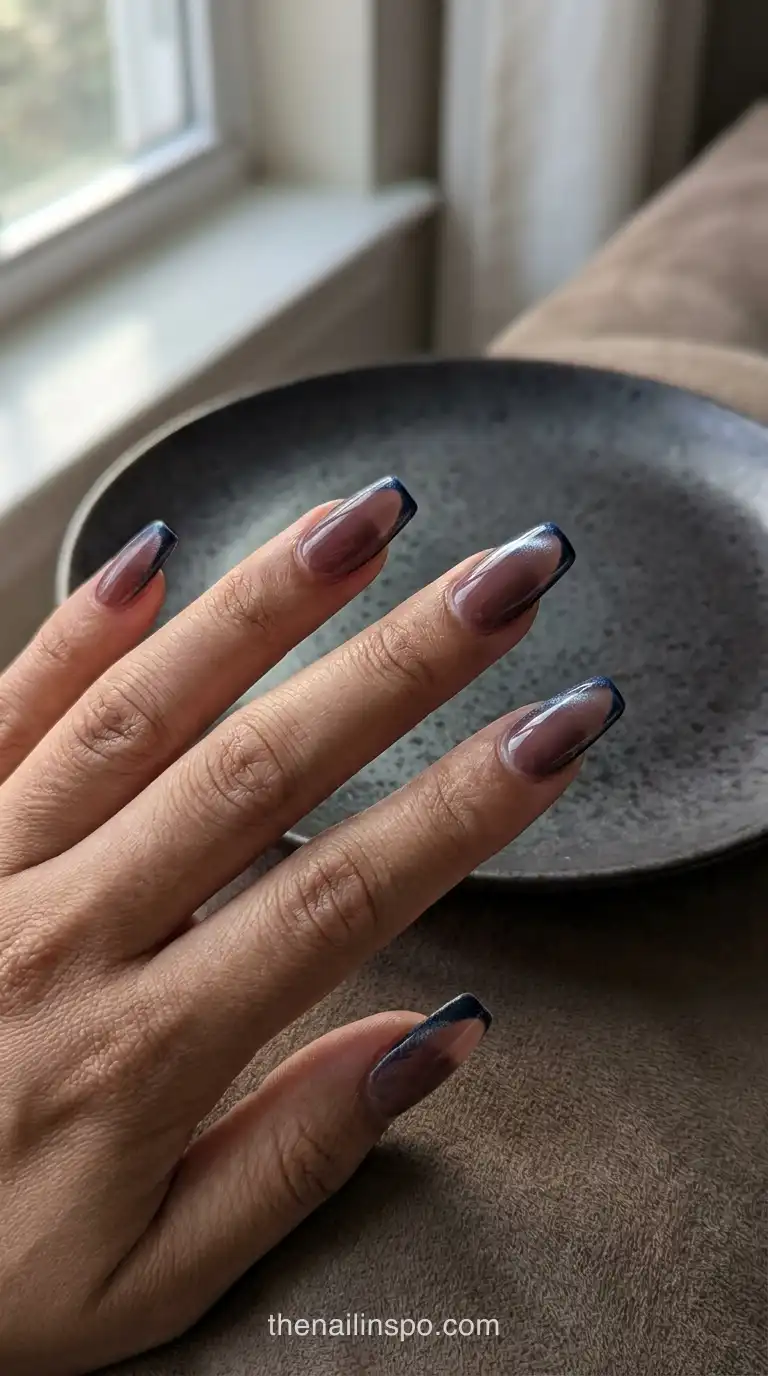
Midnight navy velvet outlines long coffin nails, while the ring finger carries a more concentrated reflective tip. Keep the accent confined to the same edge zone rather than introducing a full painted nail. The magnetic highlight should remain narrow enough to read as a border. This is a darker, single-accent alternative to the burgundy double-line design.
- Best For: A dark evening set without a second painted curve.
- Skin Tone: Deep or medium skin with cool undertones.
- Expert Tip: Identify the accent in your reference so its extra reflection is intentional.
16. Cobalt Gloss Micro Tips With Tiny Daisy Details
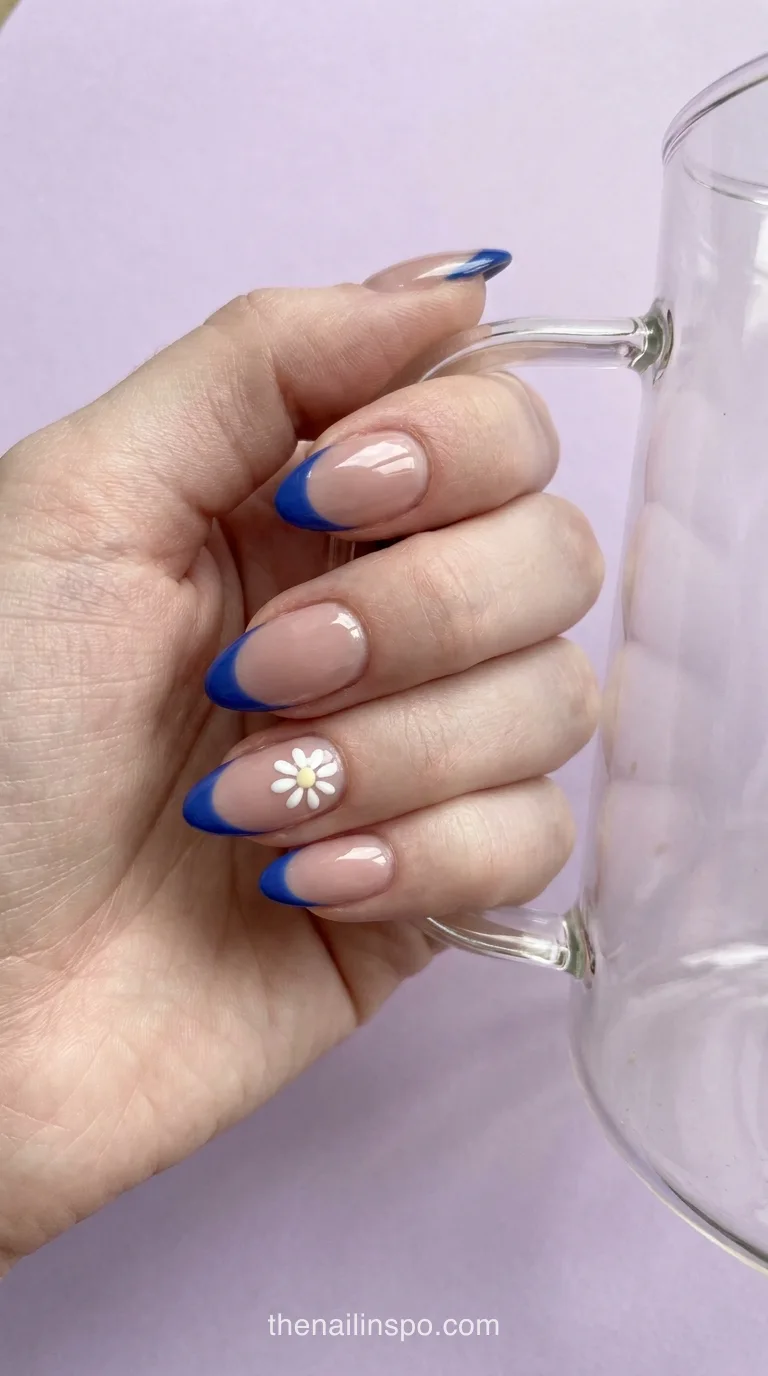
Cobalt tips frame medium almond nails, with a tiny white daisy on one ring finger and a translucent neutral base elsewhere. Place the flower off-center so the blue edge stays uninterrupted. Avoid crowding several petals into the smile line. Choose this over a full floral manicure when you want one illustrated detail rather than a pattern on every finger.
- Best For: A blue everyday set with one illustrated flower.
- Skin Tone: Cool undertones that prefer clear blue to green-leaning shades.
- Expert Tip: Keep the remaining nails free of extra dots to avoid a scattered pattern.
17. Blush Sheer Micro Tips With Soft Gradient Bases
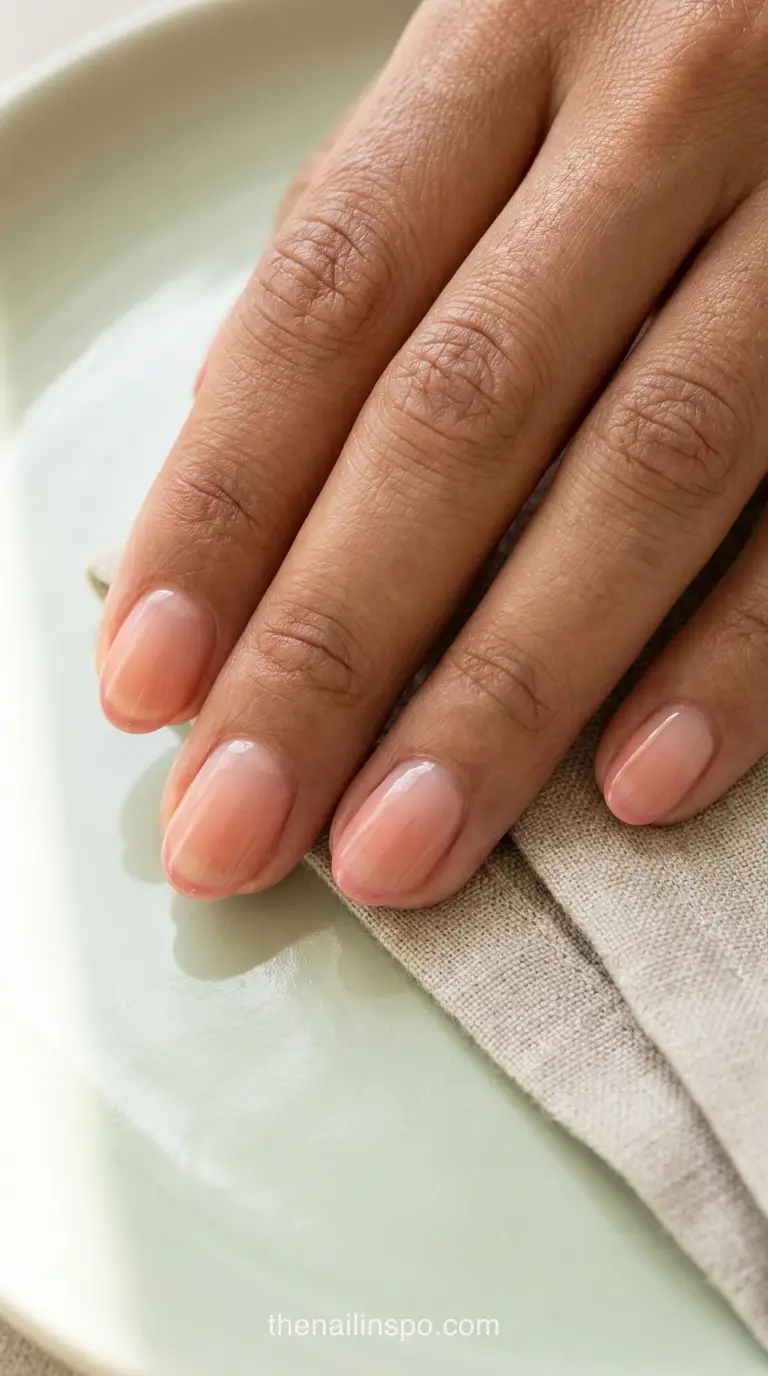
Blush edges finish short oval nails over a soft pink-to-clear base gradient. Keep the tip slightly more saturated than the adjacent base so it does not vanish. The gradient should stop short of becoming another visible border. This is the everyday closing option: a quiet color pairing with no glitter, metallic reflection, or separate accent to coordinate.
- Best For: Short oval nails when you want a quiet everyday palette.
- Skin Tone: Warm or neutral undertones with a peach-pink base preference.
- Expert Tip: View the finished sample at arm’s length to judge the overall contrast.
 Read Next19 Office-Safe Manicures Work Appropriate Nails
Making Micro-French Nails Last
Longevity depends on the underlying manicure system, nail condition, preparation, and everyday use, not the name of the design. Choose the base coat specified for the product system and follow its lamp instructions. The fine edge does not justify skipping a layer or borrowing another brand’s curing schedule.
OPI’s GelColor Intelli-Gel instructions specify 30-second cures for base, color layers, and topcoat in the OPI Star Light Gel Lamp. Mylee’s French manicure duo specifies 60-second cures with a Mylee LED Lamp. These are system-specific settings, not interchangeable schedules or evidence that one system is better.
The notes establish no universal micro-French chipping or staining pattern. If an edge wears away, identify the affected nails and product instead of blaming the design. Avoid a raised border that catches during handling.
Emma’s note: For mismatched widths and curves, establish a three-point outline before joining the line, then refine it with a cleanup brush. Check the fingers together before curing rather than judging each nail in isolation.
- More manicure ideas for the office: Compare workplace suitability beyond the color of your tips.
- Chocolate-brown manicure inspiration: Explore deeper brown coverage before choosing an espresso border.
Frequently Asked Questions
What should I ask for when booking a micro-French manicure?
Ask whether the appointment includes a French-art add-on and whether the reference requires extensions. Confirm removal separately. Mention magnetic detail or hand-painted motifs before booking so the salon can quote the actual service rather than reserving a plain-color appointment with insufficient time.
How much does a micro-French service cost?
Supplied menu examples list AU$60 for an Australian Shellac French service and ₹1,500 for a French service in Hyderabad. These aren’t US prices or confirmed quotes for the illustrated designs. Ask whether shaping, removal, extensions, and extra art are included in your salon’s price.
How much appointment time should I allow?
The supplied examples allocate 60 minutes in Australia and 75 minutes in Hyderabad, not guaranteed times for every micro-French appointment. Removal, added length, and more involved accents can change the booking. Give the salon your reference and current nail situation before it chooses a slot.
Does a micro-French manicure have a fixed wear time?
The notes establish no reliable design-specific wear duration. Regular polish, gel polish, and extensions are different systems; one illustration can be recreated with several. Ask for the technician’s expectation for the actual service, including when visible growth or a damaged edge should be assessed.
Does the design change how the manicure is removed?
The decoration doesn’t identify the removal method. A painted tip could sit on regular polish, soak-off gel, or an extension product. Ask which system is on your nails and follow its removal instructions; don’t choose a method simply because the artwork looks small.
What do the EU and Great Britain TPO changes mean?
The European Commission says TPO-containing cosmetics cannot be used professionally on clients in the EU from September 1, 2025. Great Britain stopped new market placement on August 15, 2026, with an off-shelf deadline of February 14, 2027. CTPA interprets the GB rules as allowing professionals to use existing stock beyond that deadline. These are different regional rules, not a worldwide prohibition. Check the current local requirements with your supplier.
Save the version that matches your nail length, then note changes before booking. A darker base or different finish can turn the outline into another service. Browse the nail color ideas collection if you’re still choosing a palette; bring one finished reference rather than several conflicting screenshots to your technician.
Comments (0)
No comments yet. Leave a thought below!